/data.mill for Dynamics™ CRM
Installation Guideline
The following instruction guides you through the installation and configuration of the /data.mill for Dynamics™ CRM extension for your MS Dynamics CRM instance. The extension can be added to self hosted versions and the Microsoft online solution (Office 365). After you have added the extension to your system you can use all functions for multiple forms.
Download and Installation
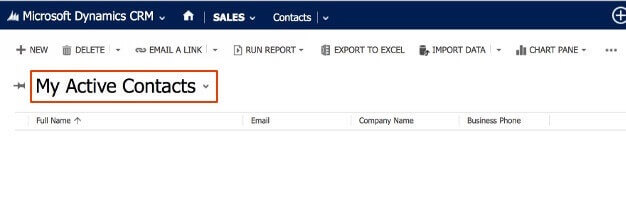
1 Log into your Microsoft Dynamics CRM system and switch to the Contact View using the main navigation on the top.
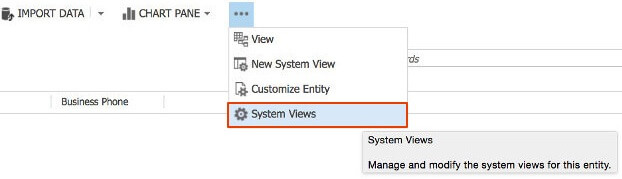
2 Expand the navigation bar and click on the System Views link. This will open a new window to list and modify entities and system resources.
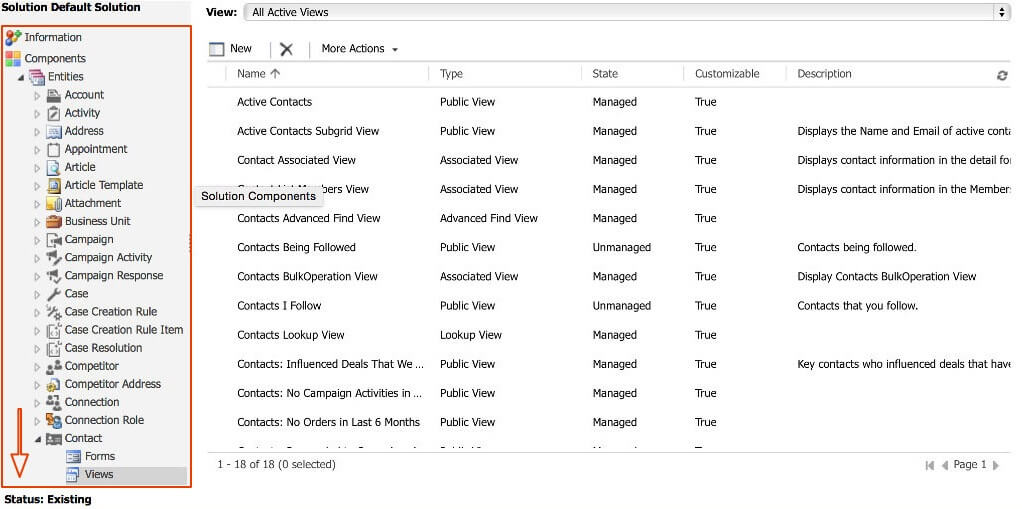
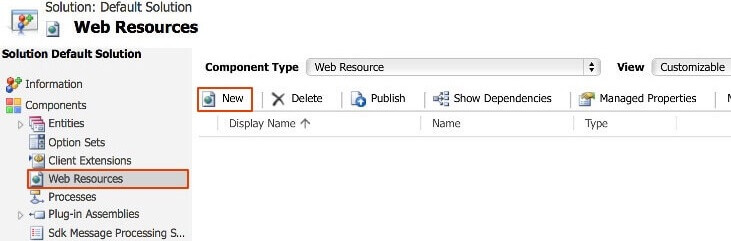
3 Use the navigation on the left side, scroll down and click on the Web Resources component. Web resources may be scripts or files that can be added to several forms.
4 Click New to add a new Web Resource. The web resource is used to add the source code of the validation functions to your MS Dynamics CRM. This will open a new window to define the properties of the web resource.
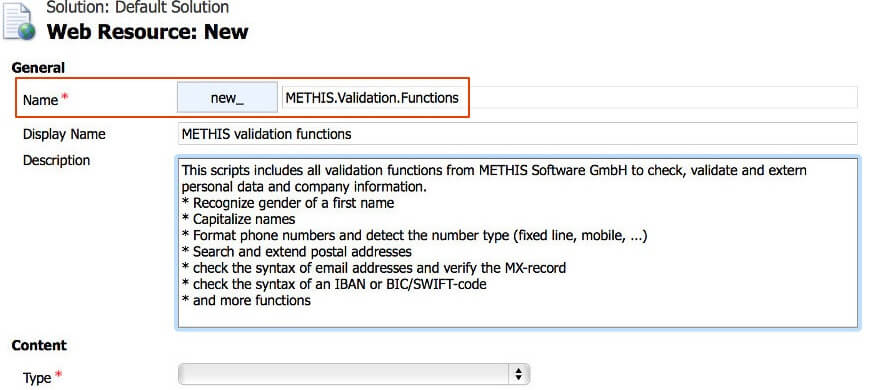
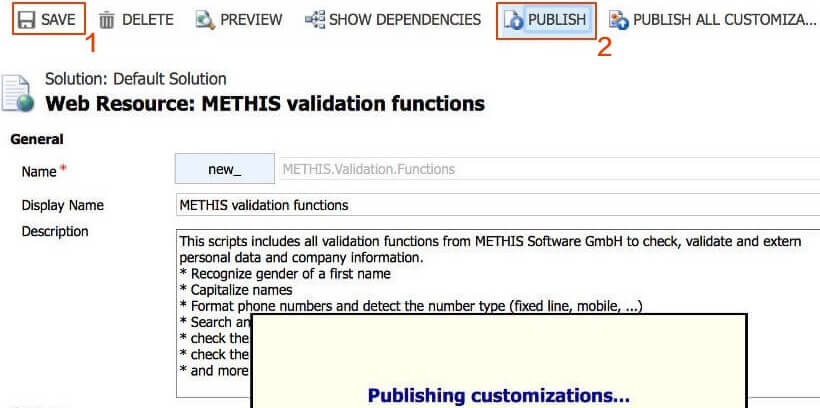
5 Enter a Name for the new web resource. The name of the resource must be unique and is used to identify the web resource when adding it to your forms. Optional you can enter a display name and a description for the web resource.
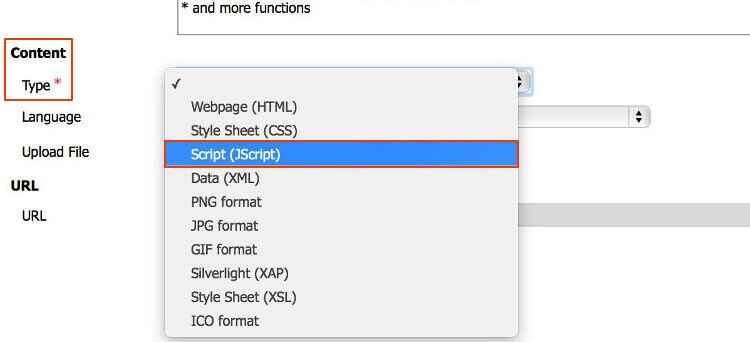
6 Set the Content Type to be a Script (JScript). A new button will appear right beside the selection, named Text Editor. Click this button to enter the content of the web resource (opens a new window).
7 Copy & paste the javascript code downloaded from datamill.solutions. This code contains all validation functions and your authentication credentials.
download the latest version now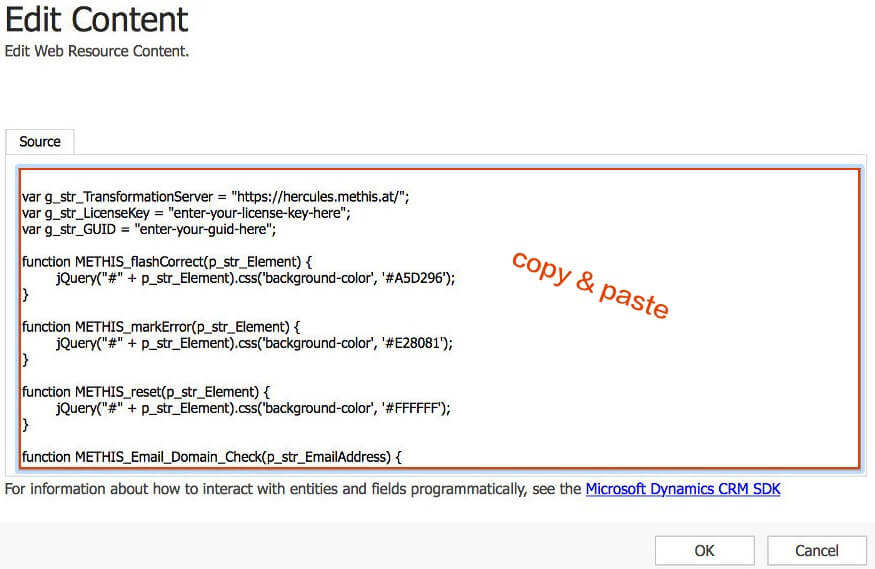
8 Create a new license key and GUID key in your web based account and add both keys to the script. These keys are used for authentication in every single request.
If you don't have an account yet you may register now for free: register now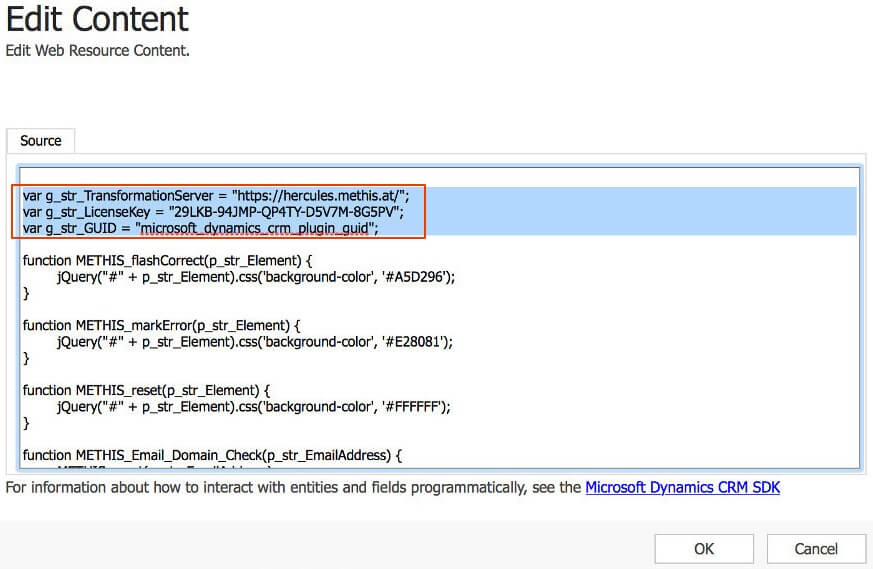
9 The last step of the installation is to Save and Publish the web resource. Now this web resource will be available in all forms and allow the usage of the validation functions.
Need any help?
Contact us!Connect your forms with our Dynamics CRM plugin
1 Log into your Microsoft Dynamics CRM system and switch to the Contact View using the main navigation on the top.
2 Expand the navigation bar and click on the System Views link. This will open a new window to list and modify entities and system resources.
3 Use the navigation on the left side and click on the Contact Forms link. Select the view where you want to use the validation functions and open it.
We have used the Contact form for this instruction.
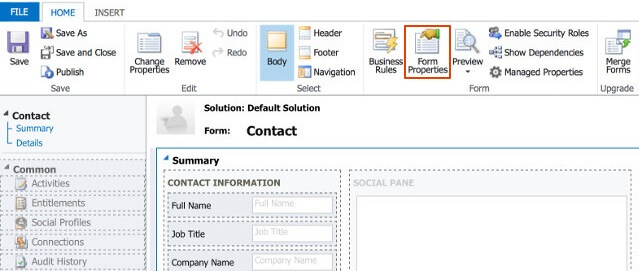
4 Click on the Form Properties button in the top navigation. This button opens a new window to change the form properties and to add/change web resources used by this form.
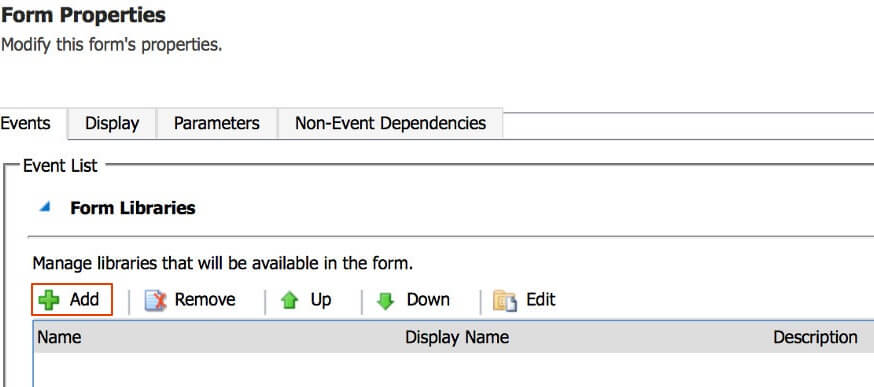
5 In the upper section of the window (Form Library) you can add and change web resources used by this form. Let\'s add our web resource containing the validation functions to this form by clicking the Add button.
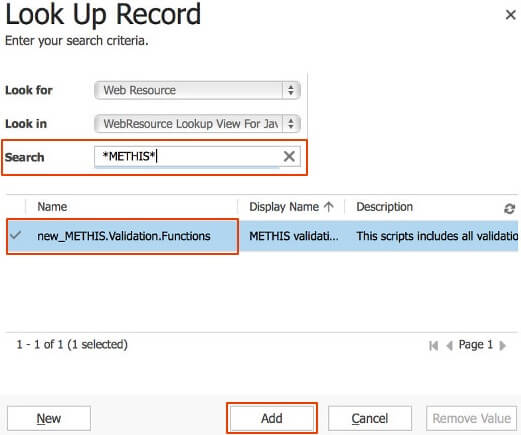
6 This list provides the names of all available web resources for this form. Select the web resource that we have created in the installation guide above and add it to the form by clicking the Add button. You can also use the search function to quickly find the web resource. Submit the changes of the form properties by clicking OK afterwards.
7 Now we are able to add our validation functions to the input fields. Our first function will be the validation of email addresses. Select the email input field and click the Change Properties button in the navigation panel on the top. A new window appears.

8 Switch to the Details tab to read the name of the input field. The name is used to identify the input field and will be required later when creating the event. In our case the input field is named emailaddress1.

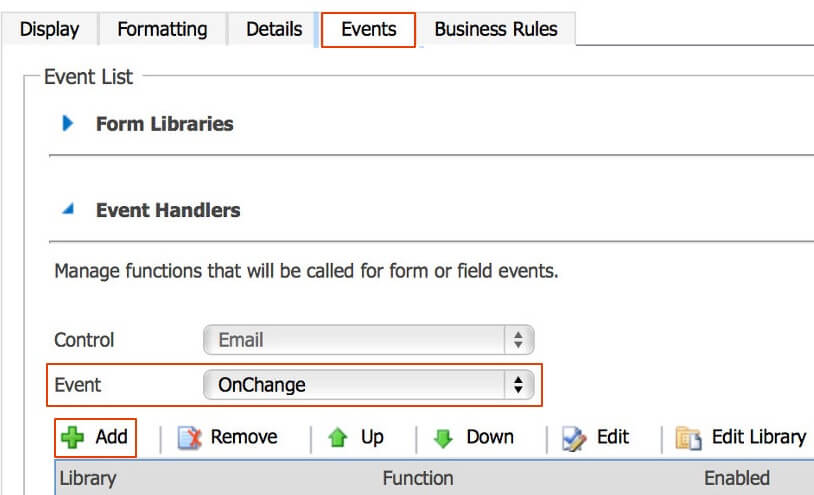
9 Switch to the Events tab to add a new event. Select OnChange as event type to trigger the new event as the cursor leaves the input field and if the value was changed. Click Add to create a new event.
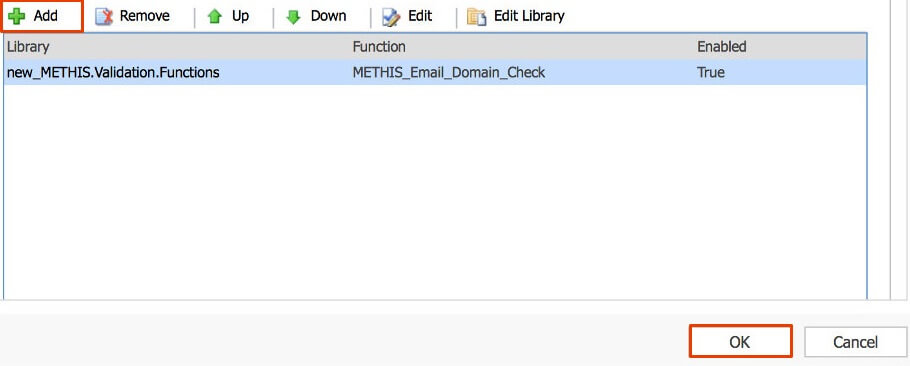
10 Select the previously added Form Library from the selection and enter the validation function name you want to execute. A list of available functions can be found here: function overview. Depending on the function chosen you have to enter some parameters.
In our case we will check the syntax and domain of the email address using the METHIS_Email_Domain_Check function. This function requires the input field name as parameter.

11 If you like to execute multiple functions just repeat the last steps and add more events. As soon as you have added all events save them by clicking the OK button.
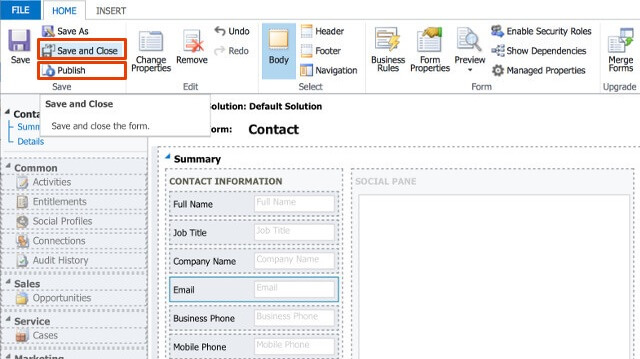
12 Now you can repeat the last steps to add events to other input fields. If you have added all events Save all changes and Publish them.
Need any help?
Contact us!Test the modified forms
1 Log into your Microsoft Dynamics CRM and switch to the Contact View. Click on the New button to create a new contact.
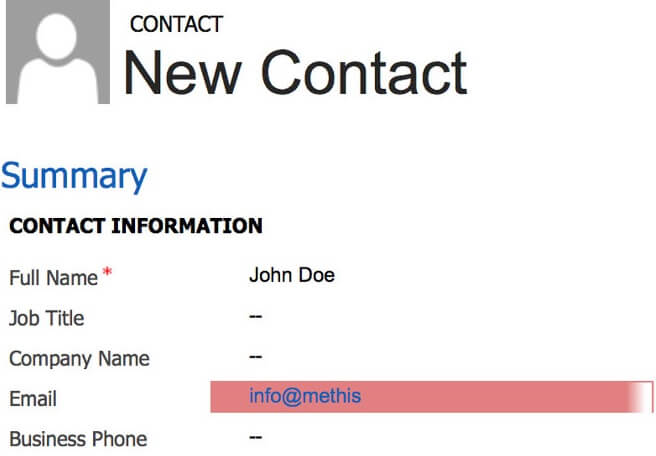
2 Enter an email address. As soon as the cursor leaves the input field and the value was changed the connected function will be executed. We have forgotten to enter the top level domain (.at) in the example, therefore the email address is invalid and highlighted with a red background color.
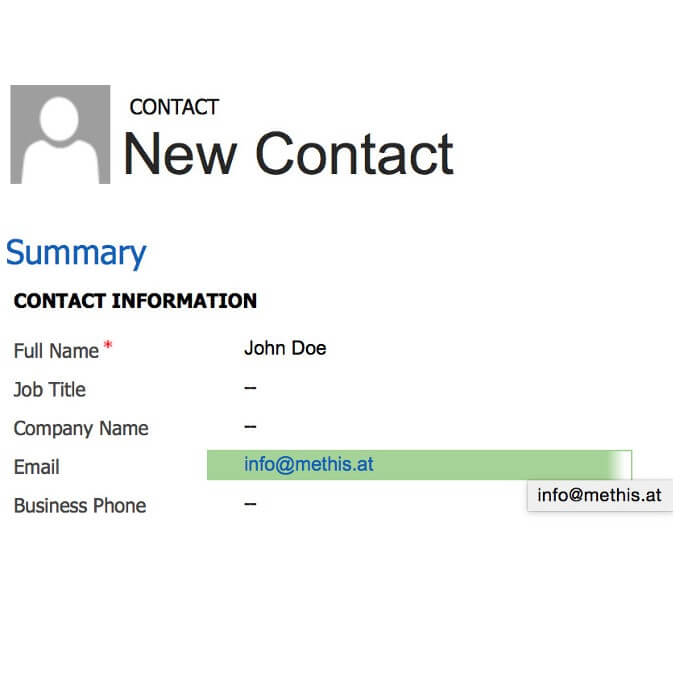
3 Correct the invalid email address by adding the missing top level domain (.at). As soon as the cursor leaves the input field the function will be executed again. The input field is highlighted with a green background color as the email address is valid now.
Need any help?
Contact us!Function Overview
This is an overview of all validation functions available in the /data.mill for Dynamics™ CRM extension.
Postal Address Lookup
Function name
METHIS_Address_Search
go to the functions's description
- The input field's name of the country
- The input field's name of the ISO 3166-1 alpha 2 country code
- The input field's name of the state
- The input field's name of the postal code
- * The input field's name of the city
- * The input field's name of the street + house number
- The input field's name of the latitude
- The input field's name of the longitude
"address1_country", "new_address1_countrycode_iso_2", "address1_stateorprovince", "address1_postalcode", "address1_city", "address1_line1", "address1_latitude", "address1_longitude"
Each parameter has to be escaped using the double quote. Parameters marked with a * are required for the execution, all other parameters are optional. If you don't want to use an optional parameter simple define an empty string between the quotes ("").
Email Domain Check
Function name
METHIS_Email_Domain_Check
go to the functions's description
- * The input field's name of the email address
"emailaddress1"
Each parameter has to be escaped using the double quote. Parameters marked with a * are required for the execution, all other parameters are optional. If you don't want to use an optional parameter simple define an empty string between the quotes ("").
Email Mailbox Check
Function name
METHIS_Email_Extended_Check
go to the functions's description
- * The input field's name of the email address
"emailaddress1"
Each parameter has to be escaped using the double quote. Parameters marked with a * are required for the execution, all other parameters are optional. If you don't want to use an optional parameter simple define an empty string between the quotes ("").
Format Phone Number
Function name
METHIS_Phone_Format
go to the functions's description
- * The input field's name of the phone number
- * The input field's name of the ISO 3166-1 alpha 2 country code
"telephone1", "new_address1_countrycode_iso_2"
Each parameter has to be escaped using the double quote. Parameters marked with a * are required for the execution, all other parameters are optional. If you don't want to use an optional parameter simple define an empty string between the quotes ("").
Recognize the Gender
Function name
METHIS_Gender_Get
go to the functions's description
- * The input field's name of the first name
- * The selection's name of the salutation
"firstname", "gendercode"
Each parameter has to be escaped using the double quote. Parameters marked with a * are required for the execution, all other parameters are optional. If you don't want to use an optional parameter simple define an empty string between the quotes ("").
Capitalization of Names
Function name
METHIS_Convert_CapitalFirst
go to the functions's description
- * The input field's name of the first / last name
"firstname"
Each parameter has to be escaped using the double quote. Parameters marked with a * are required for the execution, all other parameters are optional. If you don't want to use an optional parameter simple define an empty string between the quotes ("").
Spelling of an IBAN
Function name
METHIS_IBAN_Check
go to the functions's description
- * The input field's name of the IBAN
"new_iban"
Each parameter has to be escaped using the double quote. Parameters marked with a * are required for the execution, all other parameters are optional. If you don't want to use an optional parameter simple define an empty string between the quotes ("").
Spelling of a BIC / SWIFT - Code
Function name
METHIS_BIC_Check
go to the functions's description
- * The input field's name of the BIC / SWIFT - code
"new_bic"
Each parameter has to be escaped using the double quote. Parameters marked with a * are required for the execution, all other parameters are optional. If you don't want to use an optional parameter simple define an empty string between the quotes ("").
Resolve Company Information
Function name
METHIS_VAT_Resolve
go to the functions's description
- * The input field's name of the VAT number
- The input field's name of the company's name
- The input field's name of the country
- The input field's name of the ISO 3166-1 alpha 2 country code
- The input field's name of the state
- The input field's name of the postal code
- * The input field's name of the city
- * The input field's name of the street + house number
"new_vat_in", "name", "address1_country", "new_address1_countrycode_iso_2", "address1_stateorprovince", "address1_postalcode", "address1_city", "address1_line1"
Each parameter has to be escaped using the double quote. Parameters marked with a * are required for the execution, all other parameters are optional. If you don't want to use an optional parameter simple define an empty string between the quotes ("").
